Player/Stage is a robot simulation tool, it comprises of one program, Player, which is a Hardware Abstraction Layer. That means that it talks to the bits of hardware on the robot (like a claw or a camera) and lets you control them with your code, meaning you don’t need to worry about how the various parts of the robot work. Stage is a plugin to Player which listens to what Player is telling it to do and turns these instructions into a simulation of your robot. It also simulates sensor data and sends this to Player which in turn makes the sensor data available to your code.
A simulation then, is composed of three parts:
- Your code. This talks to Player.
- Player. This takes your code and sends instructions to a robot. From the robot it gets sensor data and sends it to your code.
- Stage. Stage interfaces with Player in the same way as a robot’s hardware would. It receives instructions from Player and moves a simulated robot in a simulated world, it gets sensor data from the robot in the simulation and sends this to Player.
Together Player and Stage are called Player/Stage, and they make a simulation of your robots.
These instructions will be focussing on how to use Player/Stage to make a simulation, but hopefully this will still be a useful resource for anyone just using Player (which is the same thing but on a real robot, without any simulation software).
1.1 - A Note on Installing Player/Stage
The install script described below has been tested with Ubuntu 12.04,
14.04, and 16.04. Each new version might introduce slightly different
package names. So it’s up to you to keep updating this script in the
future. This script is located at code/install.sh directory.
For OSX users you might find the following install instructions useful: http://alanwinfield.blogspot.com/2009/07/installing-playerstage-on-os-x-with.html
Even after it’s installed, you may need to do some per-user setup on
your system. For example, on our system, the following two lines
(adapted as needed to your particular system) need to be added to each
user’s $HOME/.bashrc file (or to the system-wide one). Edit the
PLAYERDIR according to the directory selected for instalation. If
this parameter has not changed, then the typical dir is /usr/local.
export PLAYERDIR=/usr/local
export LD_LIBRARY_PATH=/usr/lib:/usr/local/lib/:${PLAYERDIR}/lib/x86_64-linux-gnu/:${LD_LIBRARY_PATH}
export PATH=${PLAYERDIR}/bin:${PATH}
export PKG_CONFIG_PATH=/usr/lib/pkgconfig:/usr/lib/x86_64-linux-gnu/pkgconfig/:/usr/share/pkgconfig/:/usr/local/lib/pkgconfig/:${PKG_CONFIG_PATH}
export CMAKE_MODULE_PATH=${PLAYERDIR}/share/cmake/Modules/:${CMAKE_MODULE_PATH}
Does anything go wrong during the installation ? It is usually
straightforward to solve these problems. Typically, the error message
says the library or piece of code with error. Google this library name
and your Linux distribution version to find how to install the library.
Install it and try it again. If the error is after installation, during
the execution of Player, then probably you forgot to add the environment
variables to your $HOME/.bashrc file or your system has different
path names. Adjust it and try it again. You might also run
ldd /usr/local/bin/player to find out which dynamic library was not
found. Once you got the missing library name, find this library in the
system. If it was found, then add its path to the LD_LIBRARY_PATH
environment variable in the $HOME/.bashrc file. If it was not found,
Google it and install the library into your system. Then, try to execute
Player again.
1.2 - A Note about TRY IT OUT sections
There will be sections scattered throughout this tutorial labeled TRY
IT OUT that explain how to run examples. You’ll need to download the
example
code
which will contain the files. In these sections, you’ll be given
commands to type in a terminal window (or bash shell). They’ll be shown
prefixed with a carrot > and typeset in monospace font. For example,
> ls
means to go to a terminal window and type the command given (ls),
without the > character, then hit return.
In many cases, you’ll need to run the first command
(player configfile.cfg) in the background, since it doesn’t quit
till player is done. To do this, you add an ampersand (&) after the
command. So if you type player configfile.cfg in a terminal, it will
appear to freeze. If you however type player configfile.cfg & into
the terminal, it will start up player and return. Player will however
print information and debugging messages to your terminal, which can be
a bit confusing at times.
When you use files, you should examine the files to see how they are working, just running the examples will not teach you (as) much!
1.3 - TRY IT OUT (Preparation)
- If you haven’t already, download the sample code from http://github.com/NickelsLab/Player-Stage-Manual/archive/v4.1.0.zip
- Next, you’ll need to extract the sample code. To do this, open a
terminal and cd to the directory where you put the file
master.zip, then extract using zip. Yes, there are GUI-based ways to do this too. I won’t cover them here. - I’ll assume that you want to put this directory in your home directory. If not, just replace the commands given with the appropriate directory.
- I’ll likewise assume that you downloaded the code into $HOME/Downloads. (Again, your specific path may differ.)
- (From here on out, I’ll just say that your extracted source code is
in
<source_code>for brevity and generality.)
At this point, you should see one directory for each setion of this
manual, which contain the code examples for the respective chapters, and
one, bitmaps, that has pictures used in several different examples.
1.4 - TRY IT OUT
First we will run a world and configuration file that comes bundled with
Stage. In a terminal window, you will navigate to the Stage/worlds
folder, by default (in Linux at least) this is
/usr/local/share/stage/worlds. Type the following commands to run
the ``simple world’’ that comes with Player/Stage:
Assuming Player/Stage is installed properly you should now have a window open which looks like the figure below. Congratulations,you can now build Player/Stage simulations!
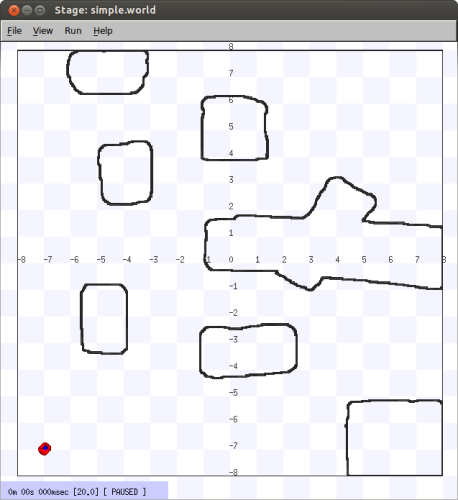
The simple.cfg world after being run
img